Time to plant Bulbs

Early single tulips combined with small flowered daffodils to provide contrasting forms.

It’s almost the middle of August and I am already planning for the coming year, in particular late winter and spring. It’s normal for gardeners and designers to be thinking that far ahead. Providing interest during those early months is especially important as the weather can be dull, with little to be cheerful about. So, a bit of colour in the garden can make a big impact.

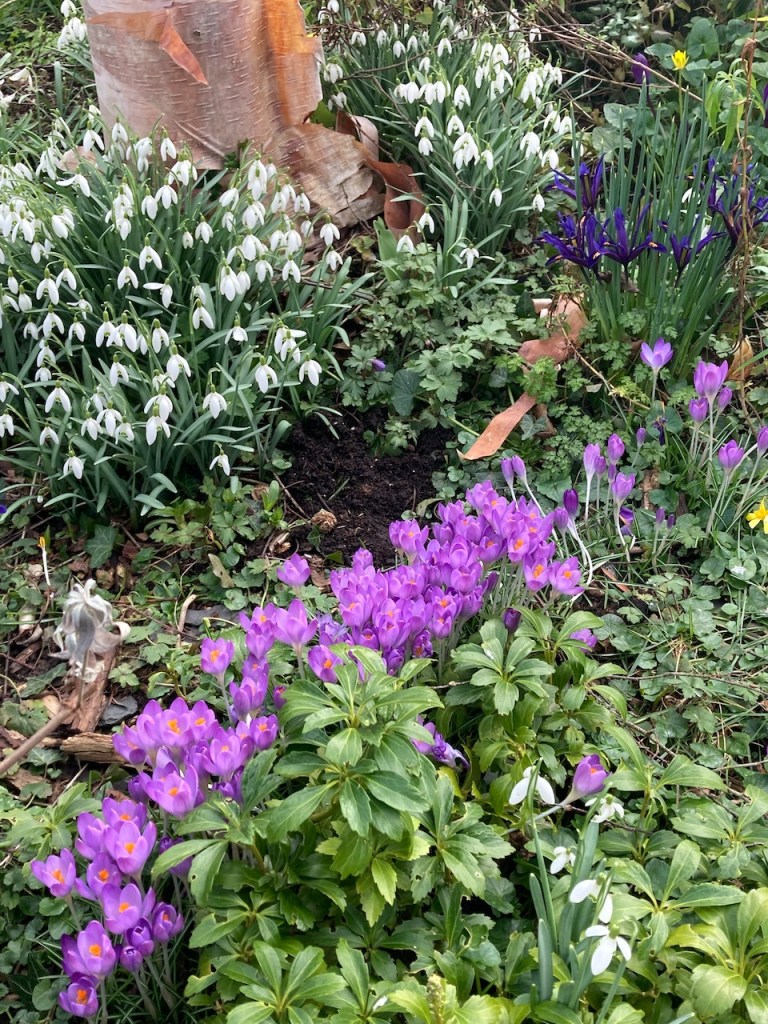
Snowdrops (Galanthus nivalis) and Winter aconites (Eranthis hyemalis) are both early flowering bulbs that will form a carpet of white and yellow as they grow and spread in humus rich soil and are useful plants to grow under the canopy of deciduous trees where the winter sunlight will spotlight their beauty.

If you are going to plant these as dormant bulbs, do it straight away, now, as dried out bulbs which have been languishing out of the soil will not flourish well. Otherwise, plant them in clumps when they have just begun to sprout leaves in winter, what we call “planting in the green”.

Snowdrops with Hellebores and  Arum italicum subsp. ‘Italicum Marmoratum’

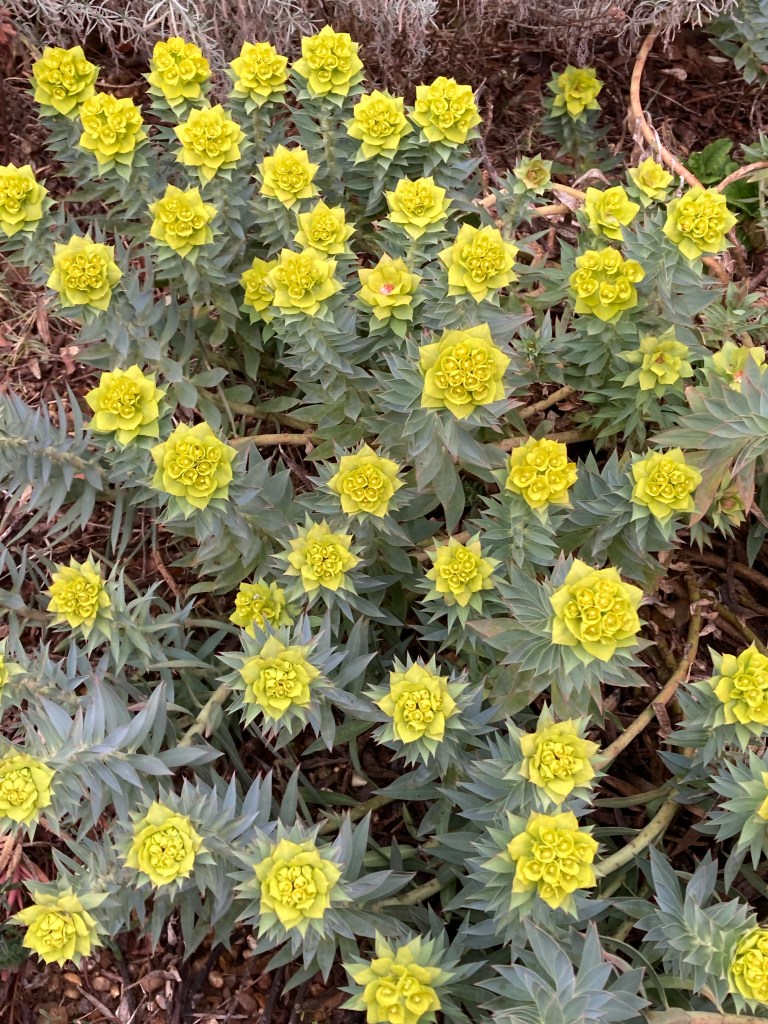
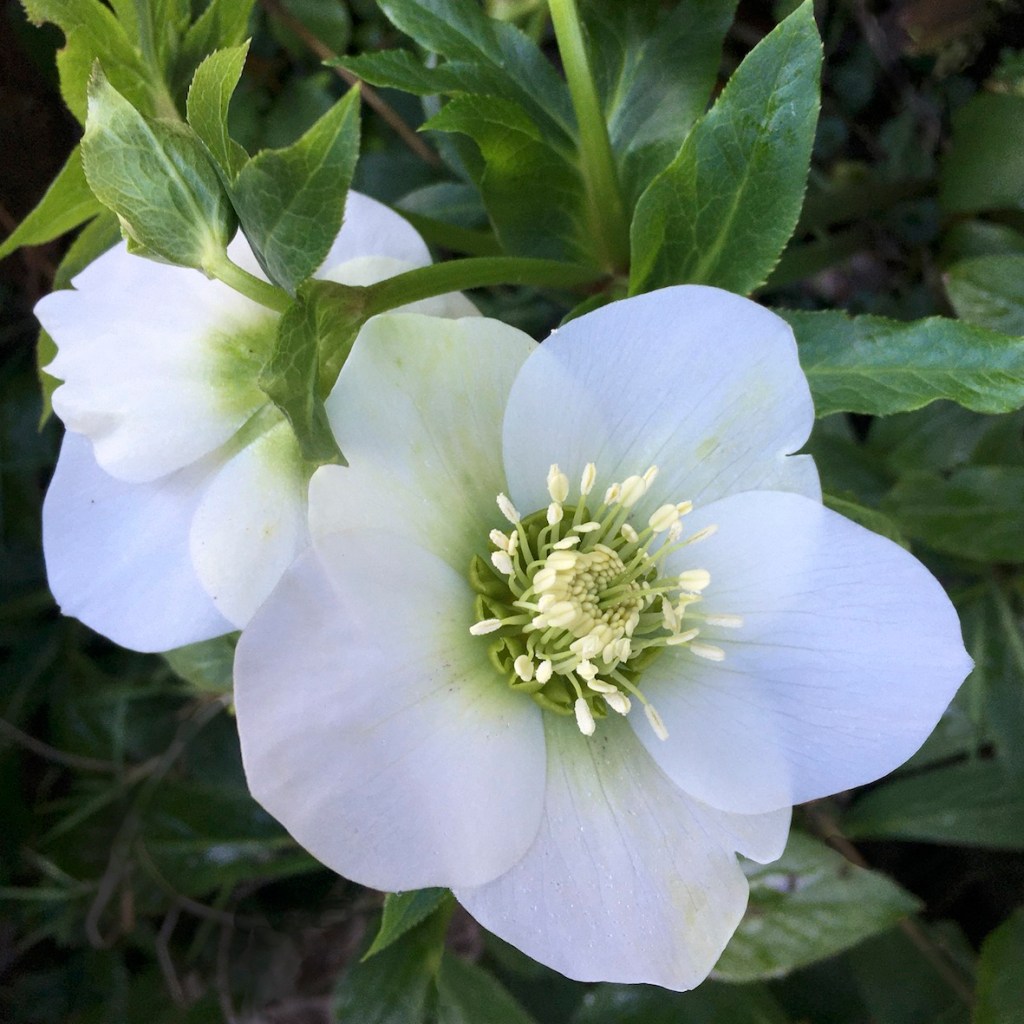
Another thing to consider when planting bulbs are their companions; the plants that will look good next to them. So see what else might be of interest at that time of year. Christmas box (Sarcococca), leathery leaved Hellebores and the marble leaved Arums looking at their best in late winter will provide a lovely foil of green to complement snowdrops and winter aconites.

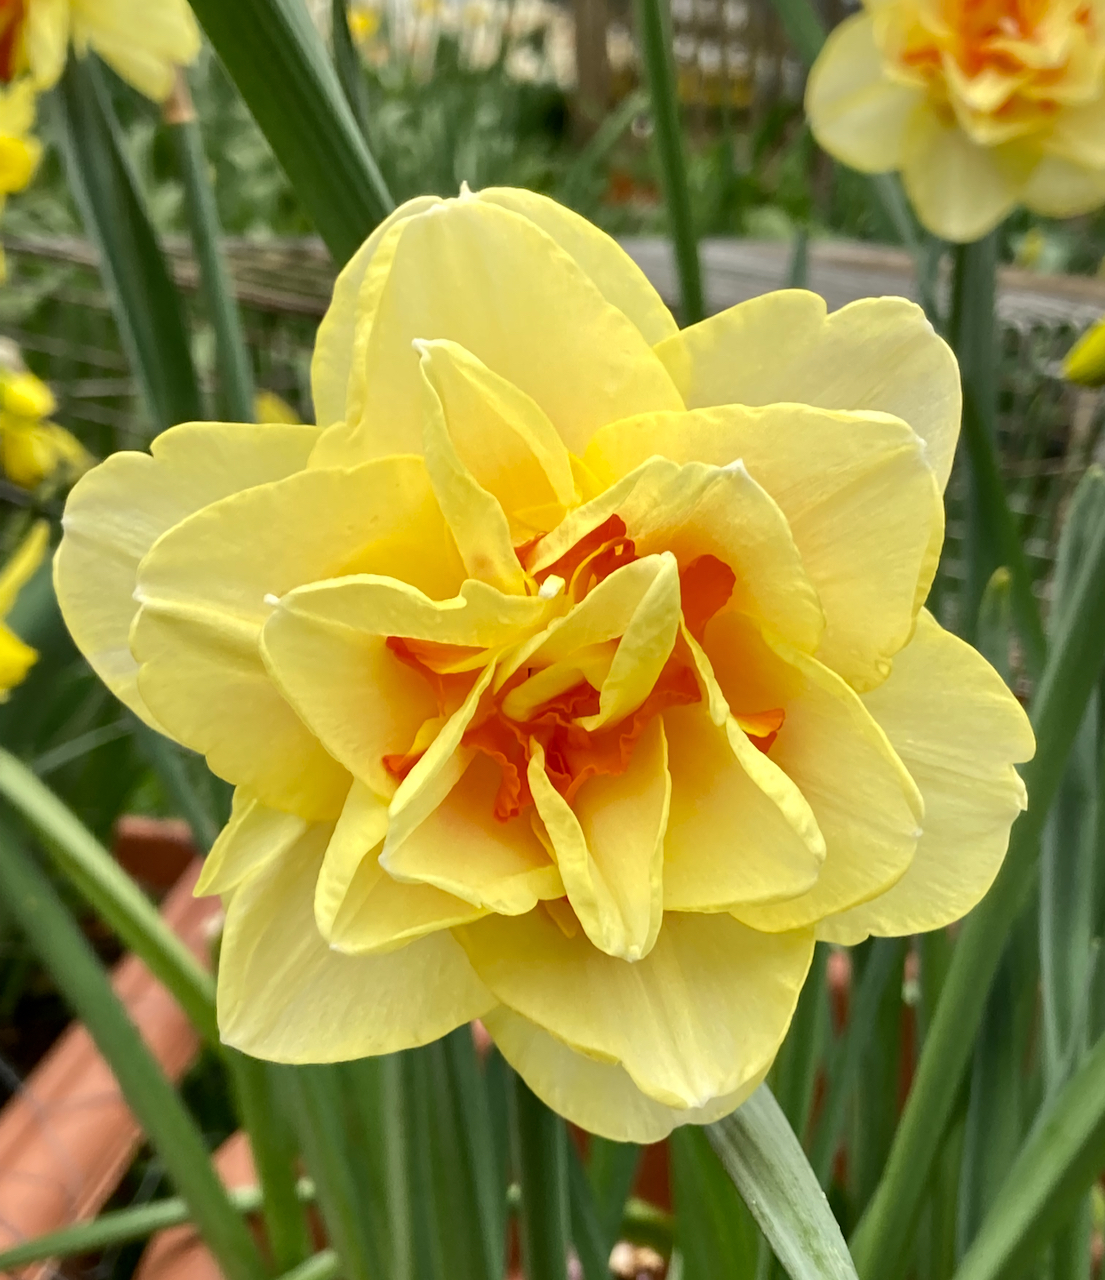
Daffodils are such cheerful flowers and vary in size and colour. Apart from the ubiquitous yellow, some are white, pale green and others have pinkish orange trumpets, so quite a lot to choose from. The smaller varieties such as ‘Tete-a-tete’ and ‘February Gold’ flower earlier than the bigger ones and look good grown in clumps some place where they can be easily seen from the window of a house. Daffodils can also be planted mixed with tulips of similar colour (See photo above) to give a variety of shapes.

Tulips with Honesty flowering in the background.

I really like to to grow lots of tulips in containers and borders in the garden. Again, I don’t look at them in isolation but try and work out what will make good companions for them. Honesty, (Lunaria annua) flowers in spring around the same time as mid-season to late season tulips, so I usually site a container full of bulbs near them.

August and September are surprisingly good times of the year to plant autumn flowering crocuses and colchicums. The saffron crocus will start blooming in October and will attract comments from those who do not realise that some of these tiny beauties flower in the Fall.

So, I hope this gives you a few ideas of what can be done now to give a bit of added sparkle to those cold months ahead.

Growing Potatoes

Have you thought of growing vegetables and flowers from seeds? In my experience, the taste of grow your own produce is just better than supermarket stuff and one gets a real sense of achievement and satisfaction out of producing your own food. So, now is a good time to plant potatoes. Even though it is a bit late in the season to buy them there are still companies who are supplying them such as Marshalls Seeds, Thompson and Morgan, Dobies etc..

Growing potatoes

Potatoes can be planted in potato sacks if you have a sunny place on your balcony, or patio. You don’t have to have a garden to grow them. Three potatoes to a sack is enough. Position the sack in a sunny area and half fill it with well-rotted home-made or bought compost and place three potatoes spaced wide apart and cover with about 15cm more compost. As the plants grow, add more compost, covering the stems of the plants, until the bag is full. Make sure the compost is kept moist but not soggy. Pick off any potato flowers as they form. When the foliage starts to turn yellow, empty the sack out to harvest the potatoes!If you have enough space in your garden for growing vegetables then potatoes are an ideal first crop because they are good at clearing the ground of weeds.

Chitting

Many people chit potatoes before planting them. Chitting is a process to encourage the growth of shoots in light and warm conditions before planting them in the soil. The theory is that by doing this, potatoes will grow more quickly and produce a larger and earlier crop than if they were planted straight into the soil. To chit potatoes place them in a used egg box or a shallow tray with the “eyes”on the potatoes facing upwards. After a couple of weeks knobbly purple-green things should start growing from the eyes. When they look like those in the photo they are ready for planting out.

This image has an empty alt attribute; its file name is close-up-of-chitted-potatoes-1.jpg
Close up of the potato stems sprouting from the “eyes” on the potatoes.

Planting in the garden

To plant the potatoes in the garden start when the soil is warming up, about 8-10 degrees C or 45-50 F. Make a long trench 15 to 25cm deep and space them 30cm apart for salad potatoes and about 40cm for large maincrop ones. The rows should be 50 – 60cm apart allowing enough space to earth them up later. The chitted potatoes need to be placed so that the sprouting bits are facing upwards. If the weather is going to be cold putting a layer of fleece over the rows will protect the fragile leaves as they emerge.

The No-dig method

An alternative way of planting potatoes without digging is to drop them into holes made with a long-handled bulb planter, causing the least amount of soil disturbance. Placing horticultural fleece over the soil and pegging it down will provide a certain amount of protection from the cold, and when the leaves emerge it reduces the chance of them being scorched by a late frost.When the potatoes begin to grow you’ll see their green leaves breaking through the soil surface. The stems will emerge and continue to grow upwards. The new tubers will grow from these stems and so to get the maximum amount of potatoes the stems are covered up to the leaves using the soil in between the rows. This forms a sort of ridge and is a process called earthing up. You may need to do this a couple of times as the plants grow especially if you see the baby potatoes peeking out of the soil. They will need to be covered up otherwise they will become green and inedible.To get a good amount of potatoes the plants should be watered during a dry spell and the soil kept moist, but not waterlogged.

Hopefully, your potatoes will grow into big healthy plants with deep green leaves. At some point they will begin to form flower buds, but these should be removed so that they don’t waste energy which could otherwise be used to make bigger tubers. The potatoes will be ready to harvest when the leaves start to turn yellow and begin to die down.

My friend Ish, with some of the potatoes she has just dug up.

It takes around 70 – 90 days for early potatoes the size of the ones you would use in salads.100 to 120 days for what’s called a maincrop potato – a large one used for mash. baking etc.Potato forks are traditionally used for harvesting. potatoes. They differ from normal garden forks in that the ends of the prongs are flattened to a disc shape, are spaced apart more widely and are slightly curved. This decreases the chance of accidentally skewering a potato when you harvest them from the plant. However, an ordinary garden fork will do the job. Harvesting potatoes is like finding treasure! Gently dig into the soil about 20cm from the base of each plant and at the same time hold and pull the stem so that you are uprooting the plant. Hopefully lots of potatoes will emerge from the soil! You may need to root around for them with the fork. Once you’ve gone down the row removing the plants and potatoes, go back again and dig through the soil to find any left behind.

And finally, you will have the choice of how to cook them, boiled, mashed or roasted?

Just another daffodil?

It’s been raining for hours as I write. The dull grey skies feel quite oppressive, but looking out on a bunch of daffodils growing across the road in a neighbour’s garden cheers me up no end. We’re used to seeing yellow daffodils along the verges around here. More and more people are planting them along the road side in front of their houses and even fields; planted en mass, they are a lovely and add interest to country roads and the otherwise dull roundabouts.

Apart from the big ubiquitous plain yellow large flowered daffodils (Narcissus) there’s quite a variety of forms that you may not know about. For a start, there are dainty forms that usually flower early like “February Gold” and “Tete a Tete” And these are best grown in groups at the front of borders or in short grass.

Not all daffodils are yellow. I particularly like the white and pale orange combination such as those in the photo above. That’s a variety called ‘Pensioner’.

I think these are ‘February Gold’ but am not entirely sure as I planted them a long time ago.

Then, there are a number of what are called “double varieties” where the tube shape or corona has been replaced by multiple petals. Sometimes the outer petals also consists of more than one whorl. These can be yellow or a combination of white, yellow and orange. I am not a great fan of the very bright ones but I know many people like them.

A “double” daffodil.

My favourite daffodils are the multi headed ones like ‘Thalia’ or ‘Rippling Water’. They are usually the last to flower in our garden, around mid-April. But I really love their more delicate looking flowers and they make a superb display if grown covering a big area. I also like to plant them in a large container with tulips that flower at the same time.

Narcissus’Thalia’ planted in a container with tulips. Viburnum davidii and Sarcococca in front.

So, these are some varieties you might like to look out for in the late summer – autumn, when they become available from nurseries and garden centres.

Annual Flower Meadows

Our annual flower meadow last year.

Having read several articles on creating wildflower meadows which involved removing the topsoil layer and reducing soil fertility, I thought it would be really difficult and arduous to produce an area full of flowers that bloomed for weeks on end, but I was wrong. Last year I plucked up the courage and had a go, but doing something much more simple and involving less work.

It all started off when we moved the trampoline off the grass and discovered that there was a large bare patch of earth left underneath where it had be sited. An so, rather than re-seeding it with grass I decided we would have a go at creating something colourful and a bit wild in its design.

Clearing the area of dead grass

We removed the dead grass and also any bits which were trying to regrow, but we didn’t dig the earth up as such. Then it was raked and the clods of earth broken down to make a sort of large seedbed.

The groundwork finished, removing stones and raking the area.

After that came the seed sowing, mainly done by my daughter and her friend.

Scattering a variety of annual seeds

We had several packets of very old seeds that I had been keeping, and given up hope of using, and so these were added to the mix of new packets of annual flowers like Californian poppies, Nigella and Sunflowers. We also used seeds that I had collected from annual flowers grown in the garden the previous year. They were pressed into the ground using our feet. In some places a very light scattering of compost was added to cover them.

the cat deterrent

We have cats, and so I had to make a cat deterrent, otherwise they would have used it to roll around in and worse things. So we assembled a web of string wound around short bamboo and other sticks. And the whole thing was watered well for several days as there was no rain for well over two weeks.

The result – weeks of different flowers.

So this was the result after a few weeks. We were surprised by how fast it all grew and the wonderful thing was that it was a constantly changing area. The cornflowers came up quickly whilst the sunflowers grew taller and then poppies took centre stage with mallows and stock adding to the mix.

some stunning sunflowers
And very delicate colourful poppies

And this went on for weeks, right through summer until September. Needless to say, we’ll be doing this again this year, starting next month. Give it a go, it’s not difficult, and really rewarding. One thing I would suggest is that if you are going to do a circle, make sure the centre is easy to reach so that you can weed out the odd unwanted plant without trampling over the rest. Better still, create two areas with a bit in the middle where you can sit and be surrounded by the flowers. Enjoy.

Helping wildlife at this time of year

It may seem surprising that there are insects flying around at this time year, but on days when the sun shines I find bees busy foraging on nectar from the winter honeysuckle. I used to think that bees and other insects came out of hibernation much later, when it was properly warm, but I was mistaken. So now I try and grow plants that will help birds and insects to survive a harsh winter and spring.

So, this is Lonicera x purpusii, a member of the shrubby honesyuckle family and this year it is covered in flowers which have been open for some weeks now. After flowering has finished it can be pruned back into a more compact shape or left to grow into a more open structure. The nectar in the flowers provides food for hungry bees and other insects that are coming out of hibernation.

Another plant which is flowering at the moment is Euphorbia myrsinites, the blue or myrtle spurge. (Photo below) It’s a low growing sprawling succulent with very geometric fleshy evergreen leaves. It enjoys well drained soil and lot of sunshine. Its sulphur yellow flowers are also rich in nectar and attract many insects. I have some growing in my garden amongst the gravel where we park the cars, but the one pictured below is at Docwra Manor Garden in Shepreth, Cambridgeshire, a garden worth visiting at any time of the year.

Euphorbia mysinites

I know there are many who aren’t keen on yellow flowers, so I will include the Daphne odora Aureomarginata’ whose wonderful scent is pervading the garden.right now. As soon as I walk out of the back door, I take a deep breath to draw in the wonderful perfume that the flowers exude. I grow it right against the house wall for protection as it’s not completely hardy and this winter it seems to have survived the -10 degrees that we had last December. It did suffer a bit and as you can see from the photo.

Spring At last!

It was a glorious today here in Cambridgeshire. The sun actually felt warm enough to make a difference. I could see bees collecting nectar from the flowering shrubby honeysuckle, Lonicera x purpusii which grows by the corner of the house. The flowers aren’t spectacular but the scent is pretty special. I like to have a number of early flowering plants especially for the insects to feed on at this time of the year. I feel it’s an important part of having a wildlife friendly garden, because it must be hard work staying alive when there’s not much to eat and the temperature drops to zero at night.

Hamamelis (Witch Hazels) are another set of early spring flowering shrubs I like to grow in the garden. Their spidery flowers range from yellows through to burnt orange and red in colour. It’s a slow growing thing, with a beautiful structure of branches that don’t need pruning, and it’s a tough plant that withstands the cold well.

The spring bulbs opened up their flowers in response to the sunshine and I could see various insects scrabbling around them. Each year the clumps of crocuses and snowdrops become larger, the latter forming a ribbon of colour amonst the evergreen ground cover. If you feed the bulbs now with a bit of slow release fertiliser they tend to produce good sized flowers in the following year.

My gardening is not completely organic; I sometimes use slow release fertilisers when I feel a plant really needs a boost. But most of the time I rely on compost, and mulches to improve the soil and feed the plants.

Wet weather

It’s been a rather damp summer so far here in East Anglia. So the slugs and snails are out in force damaging our beans and other plants. I try to remember to go out at night and hunt for them as they slime their way around the greenhouse devouring my precious plants. Tonight’s tally was around 8 snails and 12 slugs. Ugh! I only have one out of five aubergine plants left and that one is looking pretty tattered as it is. I won’t use slug pellets because they do untold harm further down the food chain. Instead, I throw the offending beasts out of the greenhouse improving my bowling skills at the same time. I know that these little monsters are an important part of the ecosystem but like many other little beasts they don’t seem to understand the word “moderation”. I think climbing French beans, or maybe it’s just any beans are to them what chocolate is to me, an irresistable delicacy.

I have been experimenting with trying to grow vegetables under glass to produce an earlier than usual crop and have had some success. We have been harvesting beans for the last week and the tomatoes are turning red despite the lousy weather conditions. I have some early potatoes in a big Ikea bag languishing in another greenhouse and they look like they may be ready to harvest in the near future.

look what I found in the greenhouse!

GARDENING FOR WILDLIFE AND WELLBEING

ROSES

Roses look spectacular in June; it’s their first display. Some will repeat flower later on in the year, but many old- fashioned and wild roses will only bloom once in summer and often go on to produce hips in the autumn.

Rosa ‘Mayflower’ is a very easy to grow variety which produces masses of blooms in early June followed by more subdued flowering throughout the summer and well into autumn. Primroses are planted at the base of the shrubs and these flower in spring well before the rose bushes are in bud. Aquilegia and a few alliums are added to compliment the roses.

Rosa ‘Mayflower’ with white allium.